Recently I set about installing RancherOS. This was just to have a look and see what use cases it might help with. I chose to install RancherOS to a VM. In my case, VMware workstation. A roadblock I hit was providing an SSH key to the cloud-config.yml file.
The roadblock specifically, how can I send a file to a system I don’;t have a password or SSH key for?
This article covers, generating an SSH key, SSH access to live CD and installation to hard disk.
Requirements and Prior reading
Before starting with RancherOS, it’;s a good idea to read the documentation. This is available here. We will be performing a bare metal install to disk, specific documentation is here.
You need to download the RancherOS ISO image. See above link.
Your VM does not require much in the way of resources. 1vCPU and at least 1.5GB of RAM. The minimum RAM requirement is 512MB. However, 1.5GB is recommended for the installation. For my testing, I have only allocated 20GB of disk space, adjust as required.
Booting RancherOS for the first time
Configure your VM and point to the RancherOS ISO image as boot media. The ISO image is a live boot disk and will auto login to the account rancher. We do not know the rancher password. This presents an issue with accessing via SSH. We will need to create a password. This will not come across during installation.
Run the following commands:
| |
This will take you to a bash prompt as root and allow you to set a password for the rancher user account.
Set the password and use exit to go back ranchers shell.
Now that the password has been set, we will SSH to the VM.
Launch your preferred terminal emulator and SSH using the rancher username and the password you just set.
Generate SSH keypairs
There are a number of ways to generate an SSH keypair. As I’;m on a Windows system, I will be using PuTTYgen. Which can be downloaded from available here.
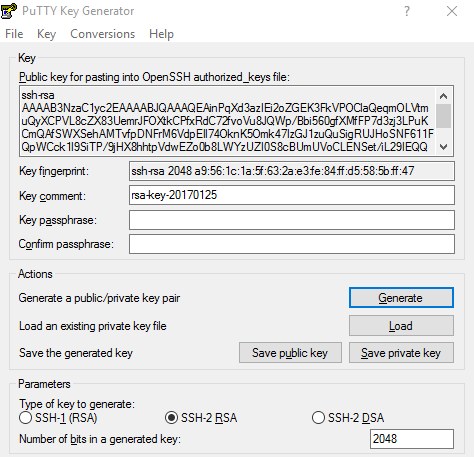
Launch PuTTYgen and click the generate button. Move your mouse around the blank space to generate the key.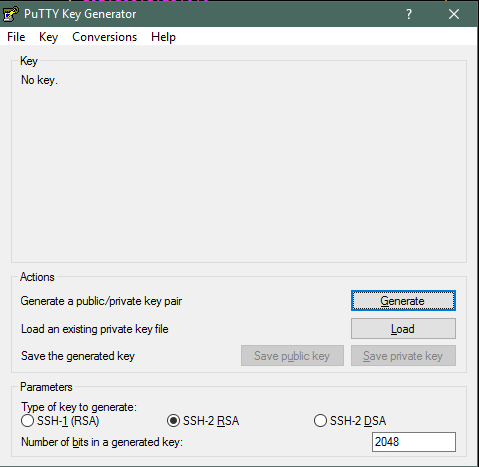
Enter a key comment, this is optional.
Enter passphrase if you choose. This is optional but better security.
Save the public and private key.
Select the public key and copy.
Create Cloud-Config.yml
Using the SSH session we opened before, we will create our cloud-config.yml file. Running the following command
| |
Type in the relevant information for your system. I have provided my cloud-config.yml file as an example.
| |
When entering the ssh_authorized_keys past in the public key from PuTTYGen that you copied before.
Write quit vi.
You should now have a valid cloud-config.yml file with an SSH key that matches the private key on your system.
Install RancherOS to disk
Installing RancherOS to disk is a single line command. If your VM does not have internet access, go back to the documentation link. Rancher provides details on that method.
| |
After the installation, reboot the system.
SSH to Installed OS
Just to recap, we now have RancherOS installed to disk and a valid key pair for the purpose of SSH.
Using your preferred SSH client, connect using the username rancher and the private key you saved from PuTTYgen.
Putty:
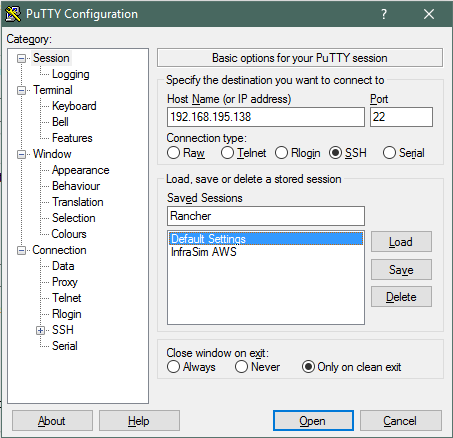
Enter IP Address and Name for Saved Session as we will save this.
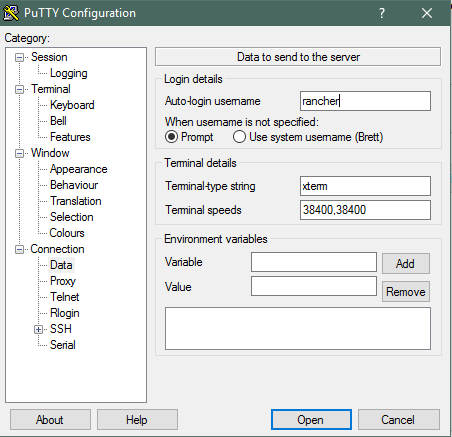
Go to Connection > Data and enter the auto-login name as rancher
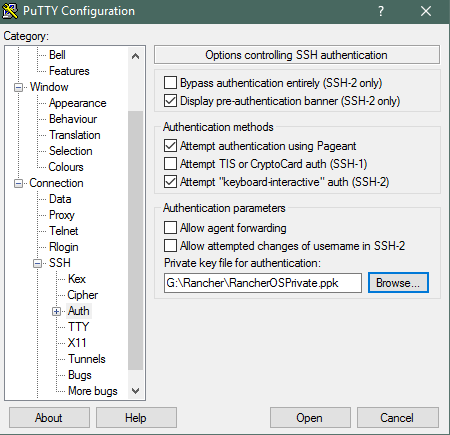
Go to Connection > SSH > Auth and browse for the Private Key
Go back to Sessions and click Save.
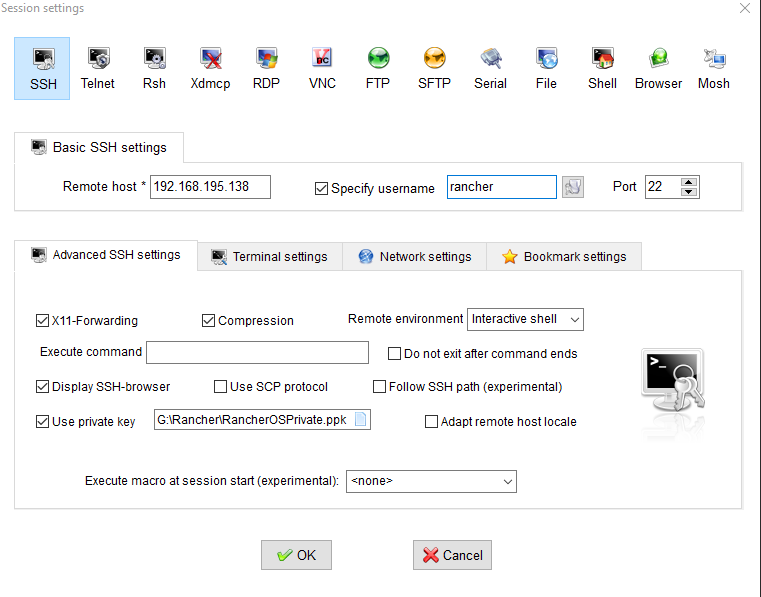
MobaXterm (Another Terminal Emulator)
Summary
Initially, I had trouble being able to ssh to the live session. Which meant I could not create the cloud-config.yml file with a valid SSH key. These are the steps I used to get everything setup for testing.
